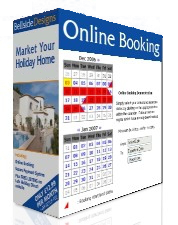
 Extension
You can download the latest plugin/extension for the Booking Wizard from here:
 |
download plugin for Joomla 1.5 |
 |
download plugin for Joomla 1.6 |
 |
download plugin for Joomla 1.7 |
 |
download plugin for Joomla 2.5 |
 |
download plugin for Joomla 3.0 |
Please read our installation documentation below, but if you do have any problems then contact us direct.
Installation is simple, you need to register first for your account and then follow the following steps or refer to the documentation within the package.
If you do not want to register, but you want try the Booking Wizard Plugin, then use the following information below along with the relevant plugin above and you should be able to display our demonstration booking widgets on your test site:
| Demo Account Information | |
|
Account ID:
|
demoAccount |
| Property codes: (case sensitive) |
Vista Landmark Florida Portal |
Joomla Installation Instructions
Register
Once you have successfully registered and activated your account using the link sent to your email, you can log in and configure your environment.Login to your administration centre on our site
Create Property Codes - (Add property codes to your account. The names of the property codes can be any alpha-numeric word).
Define prices and responses - (Do this for each of your properties. Configure prices auto responders, extras etc.)
Now you can begin to add the widgets to your website.
Installing
Download the latest zip package from the main page.
and save to a local folder
Log into Joomla:
Extensions -> Install/Uninstall
Choose File (browse and select the latest package)
click on "Upload File & Install"
Now Configure:
Extensions -> Plugin Manager
Click on Content - Booking Wizard
Make the following settings:
Enabled -> Yes
Language -> en,fr,es,.....
AccountID : demoAccount (or your own account id generated on registration)
Debug : Set to yes if you want the frame position shown.
Save
Note: Verify that the Enabled flag is showing a green tick.
Adding to your Content
Content -> Article manager
Select an article
Add the following syntax to your article text. (Do not copy and past in case you paste html hidden codes into your document.)
For a booking calendar widget:
{booking property,[propertycode],[css styles]}
where: propertycode has been defined by you in your administration centre.
e.g.
{booking property,vista}
or with some styling:
{booking property,Vista,background-color:lightsteelblue;}
For Availability widget:
{booking availability,[css styles]}
e.g.
{booking availability}
or with some styling
{booking availability,position:absolute;right:3px;top:300px;background-color:yellow;}
For administration widget:
{booking administration,[css styles]}
e.g.
{booking administration}
or with some styling
{booking administration,background-color:#dddddd;border:1px solid black;}
Save the article and now access the article from the main website. Your widgets should appear inside your content.
